How to Connect with Netgear Installation Assistant?
Being one of the popular and widely used networking brands, Netgear offers various internet-related services at a cheap rate. These routers are quite popular and known because of their reliability and various features that make them easy to use. But sometimes, you may encounter various issues while using it.
It is very important to fix these common issues to bring your router again in a working state. Many users have a complaint about issues in configuring range extender setup with Netgear installation assistant. Here, in this article, we have mentioned some of the simplest and quick steps to continue with the Netgear installation assistant.
Quick Steps to Connect with the Netgear Installation Assistant
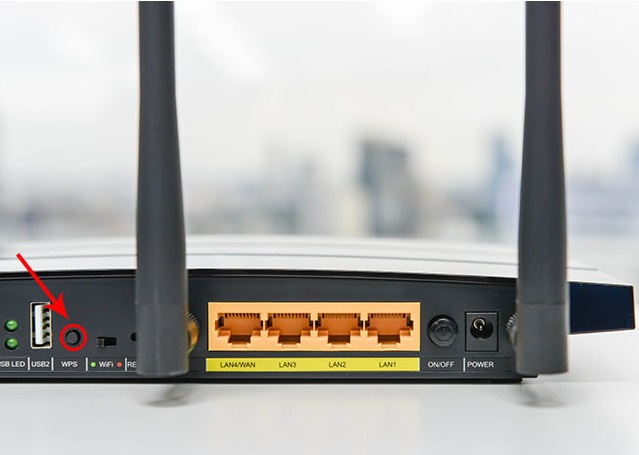
You can easily fix any issue by resetting your router. For this, you need to press the WPS button for a while. It is important to know what is WPS button on router and where it is located. Once the issue is successfully fixed, you can follow the steps given below to complete the process of range extender setup with Netgear installation assistant:
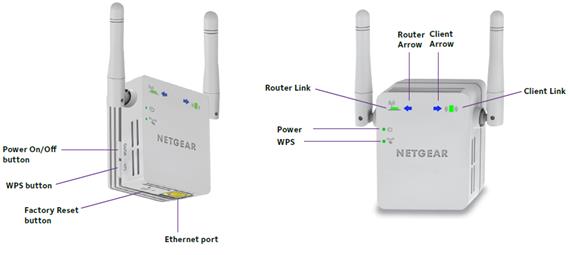
- Firstly, place the extender near to a power outlet and turn ON the supply and wait till the LED to lit green.
- Then, connect your device using your wifi connection or Ethernet cable. In case of connection, open the connection manager and locate the NETGEAR_EXT option.
- After clicking on the NEW EXTENDER SETUP button, enter the details in the given field and press the NEXT button.
- Check and verify that the Access Point/Extender switch is set to Extender only then move to the next step.
- Now click on the name of your wifi and tap the Next button. You can also change the wifi bands. However, you can clear both Wi-Fi bands if you don’t want to use them.
- After this set the SSID and password of your extender along with all other asked details.
- Then, connect your wifi-enabled device to the new extender. For this, you need to enter the SSID and password that you have just created.
- After successful connection to the new extender, you will receive a message confirming that your device is connected.
- Then, click on the Next button and enter all the required fields on the registration page. Click on the This will almost reach the completion of the setup.
- Now ensure that your extender device is placed in the proper place between your router and other devices. This will ensure the Netgear installation assistant is done properly.
The above steps will help you to configure or complete the Netgear extender setup. If you find any difficulty in the process then, try to contact Netgear router manual guide to fix the problem.
Comments
Post a Comment